

HOW TO PREP FOR A TAN
How to prep for a tan.
Australia has the highest reports of skin cancer in the world. It isn’t any wonder why spray tans are so popular here!
Australia is also one of the most affordable places in the world to get a tan. Can you believe that a spray tan in New York City can cost as much as $60 USD, That’s roughly $80 AUD.
Shocking, right?
While sun bathing is unsafe all over the world, the sun just isn’t as harsh in other places so there isn’t such a high demand.
In Australia we all want that sun kissed look, without the risk of cancer, heat stroke, sunburn and then of course blistering, peeling and then fading back to pale. The struggle is real.
Prepping for the perfect tan is really quite easy, but it is a 24 hour process.
Don’t worry, I will guide you through it.
Step 1: Have a shower, shave & exfoliate your legs. (Easy Right?)
Step 2: Moisturise your skin…. You weren’t expecting that one were you?
Step 3: Go to bed and enjoy those silky smooth legs on fresh sheets. (I can’t be the only one to think that is the best feeling in the world?
Step 4: Wake up and be fabulous!
Step 5: Before your spray tan appointment, jump back in the shower and use a body wash that doesn’t leave any residue on your skin.
Step 6: Dry yourself from top to toe and don’t put any products on your skin. Not even deodorant.
Step 7: Wear some loose fitting clothes with no lines that cut into your body. (I personally like a loose t-shirt dress)
Step 8: Head to your tanning appointment with your air conditioning on or your windows down. The last thing you want right now is to sweat… You’re so close to the finish line!
Step 9: Get your clothes off and get your spray tan! (YAYYY)
Step 10: Have a chat to your tanning artist and find out how long it will take for your tan to develop before you can shower.
Step 11: Head somewhere cool, where you aren’t going to sweat or stick to anything.
Step 12: Rinse your tan off after the required amount of time. Don’t pee in the shower and it’s best not to use any soaps or body wash at this rinsing point as the tan is still developing. Soaps & the acidity in urine can strip away the tan, leaving behind streak marks.
Step 13: Pat yourself dry and go about your day like normal and enjoy your amazing tan.
Moisturising and keeping the skin supple between showers is important to prolong your tan, or have a chat to your tan artist about a tan extender product.
Contact us at Shining Bright Salon on 0400 126 929 to get your next tan!
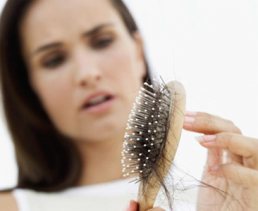
WHY AM I LOOSING SO MUCH HAIR?
Why am I loosing so much hair?
That’s a great question but there is so much more to loosing hair then you may think.
Finding hair in your hair brush is normal.
Did You Know?
It’s estimated that we shed about 50 to 100 hairs each day.
When you start losing an unusual amount of hair, however, it can be cause for concern.
Losing hair normally doesn’t have much effect on your appearance, as your head has plenty more to make up for the daily loss. But there may be a more significant reason for your hair loss when you start seeing your scalp or bald spots.
When you think of hair loss, you may think of genetic factors, Hormones, thyroid problems, infections, medications, and other diseases can all cause hair loss too.
So what are these various causes and how do you know if they’re to blame for your excessive shedding?
Hormonal Changes
A lot of Women experience a lot of hair loss after childbirth for several months after the delivery. You can also shed while going through menopause.
Thyroid Disorders
Perhaps one of the most common hormone-related causes for hair loss is a thyroid problem. Both too much thyroid hormone (hyperthyroidism) and too little (hypothyroidism) can lead to hair loss. Treating the thyroid disorder can often reverse the hair loss.
Stress
Physical and emotional stress can cause hair loss. Surgery, high fevers, and blood loss can cause enough stress to cause excessive shedding. As for psychological stress, the link is less well defined, but many people have reported losing hair at times of extreme mental stress or anxiety.
Fortunately, the causes of physical stress are often temporary and the hair loss subsides as the body heals and recovers. You can combat mental stress with daily exercise, proper nutrition, meditation, and removing known stressors from your life.
Research also shows that it can be linked to lower self-esteem, body image, and increased anxiety. Fortunately, many of these non-genetic causes for hair loss can be successfully treated and the hair loss averted and even reversed.
Medications
Pharmaceuticals can come with a long list of side effects, including hair loss. Chemotherapy is the most well-known culprit, but others include:
thyroid medications, some oral contraceptives, anticonvulsants, antidepressants, anticoagulants
These medications affect people differently, and may not cause hair loss in everyone.
Nutritional Deficiencies
Zinc and iron deficiency are the most common nutritional links to hair loss. But some evidence indicates that low intakes of fats, vitamin D, vitamin B12, vitamin C, vitamin A, copper, selenium, and biotin could also be to blame.
Skin conditions like psoriasis and dermatitis can occur on the scalp and interfere with hair growth.
Your more than welcome to talk to your hairdresser about what’s concerning you and the potential causes for your hair loss but also talk with your doctor. They can recommend a treatment that’s right for you.
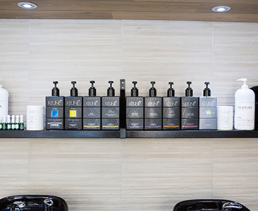
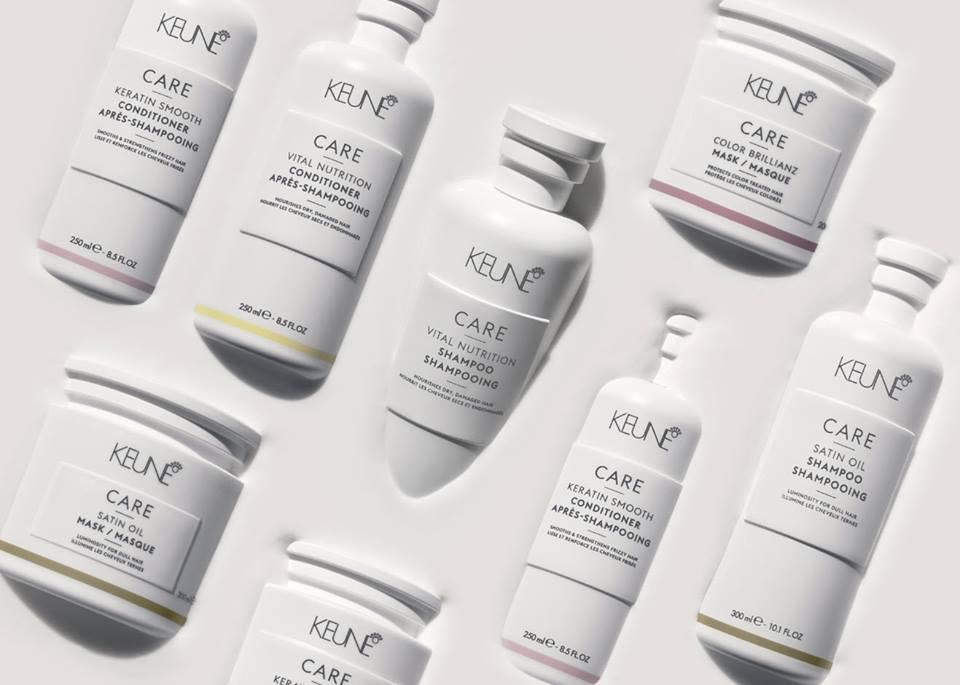
COLOUR BRILLIANCE
Colour Brilliance Shampoo And Conditioner
Colour treated hair needs extra protection and care. The colour sealing complex provides a protective layer. This prevents the colour from fading during shampoos.The UV-A and UV-B filters provide protection from the sun. Herbal sunflower seed extract gives extra protection and care.
Brilliance Conditioning Spray
A moisture rich leave-in conditioning spray which leaves hair extra smooth & shiny. The use of LP300, Panthenol & Vitamin E ensure hair is regenerated, protected & has a long-lasting beautiful vibrant color. Apply to dry and towel dried hair.
Careline Range
Keune Care Line nourishes the hair and helps to balance the natural function of the scalp. Essential Minerals, from natural sources, play a key role. Treatment with the help of essential minerals will provide long lasting improvement of the condition of the hair and scalp. Hair will become silky smooth and easy to manage.
Nutrition Range
Dry, Porous and damaged hair can be improved by adding minerals to the hair. The vital Nutirition regimen add moisture to the inner hair structure. Hair protected from dehydration and external influences such as UV rays and chemical services. Vital Nutrition leaves hair smooth, soft, shiny and easy to detangle.
Nutrition Treatment
An instant & intensive repairing treatment formulated to restore fragile, extremely dry & damaged hair. Wheat Micro Proteins penetrate the hair to the medulla to restore the inner structure & assist it in regaining strength. Keravis strengthens the inside and out of the hair, leaving the hair soft, shiny & easy to detangle.
Mineral Hair Spray
Concentrated conditioning, finishing hairspray. Gives super long lasting hold, condition and shine. It is not sticky and is easy to restyle.
Mineral Mousse
Styling mousse for strong hold, volume and shine. Provitamin B5 conditions the hair and makes it easy to detangle.
Ultimate Shine Repair
Smoothing serum to prevent frizz, split ends and fly aways. Provides incredible shine and heat protection.
Repair
For strengthened, glossy hair with regained vitality. The Organic Argan Oil in Keune Repair Shampoo gently cleanses and strengthens the hair, adds shine, softness and a silky feeling. Suitable for daily use. Improves the condition of dry and damaged hair Organic Argan Oil strengthens the hair and add shine and softness. Panthenol controls the moisture balance. Polymers improve comb ability.
Thermal Spray
Protects your hair from thermal damage like hairdryers and hair straighteners.
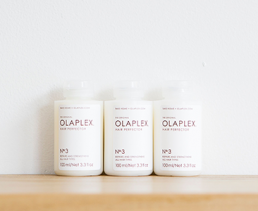
WHAT IS OLAPLEX?
If you haven’t heard of the new hair colour revolution product Olaplex, you must be living under a rock?
Olaplex is everywhere at the moment and for a good reason, this new professional hair colour additive is set to revolutionise hair forever.
Olaplex helps to protect your hair from damage through the lightening or colour process.
If you’ve ever been had highlights, you’ll know that your locks are often left more damaged than before — just think about Kim Kardashian drastic colour change!
All our clients that tried Olaplex are raving about it “I’ve never had so many compliments on my hair”. “My hair that was breaking, has now stopped, I can’t believe it”
“It felt incredibly soft — no fly-aways or doesn’t feel like what normal blonde hair would feel like”.
“Its been a life saver for my hair
What is Olaplex?
Olaplex is a Bond Multiplier. It activates with the colour by restructuring your hair bonds at the same time as the colour. This dramatically reduces breakage with every colour service. It doesn’t matter if you have a natural looking semi-permanent colour or you’re on the other end of the colour spectrum with bleach blonde all over. It is perfect for everyone.
SHINING BRIGHT’S ULTIMATE GUIDE TO WINTER HAIR CARE
Shining Bright’s Ultimate Guide to Winter Hair Care
Winter really takes a toll on our hair! Shining Brights’ Ultimate Guide to Winter Hair Care provides easy, common sense techniques to ensure your hair stays happy and healthy throughout the cold weather months.
Follow the tips below to ensure your hair stays beautiful and healthy despite the cold, dry air and other problems winter can bring!
Condition, condition, condition! Dry heat and cold weather zaps hair of it’s moisture. Because dry hair breaks easily, the most important thing you can do during the cold months is to deep condition regularly and use a more intensive daily conditioner.
Avoid using heated appliances as much as possible. Using a blow dryer, curling iron or flat iron dries hair out even more in winter. But always make sure that you use a thermal spray if you do
Avoid chemicals. Don’t perm or use a lot of peroxide color in winter. Try having lowlights or a few highlights added to just a few strands of hair to give you that extra glow.
Don’t wash your hair to much. It washes away all the natural oils that your hair needs. Its best to use dry shampoo to take away the oils then wash your hair!
Cover up! If you are going to be outside, especially in extreme temperatures or wind, use a pretty silk scarf to protect your hair from the elements. Sun can also be as damaging in winter as it is in summer!
Remember that your hair can be more dry and brittle in winter, and thus be much more delicate. Try to avoid over-brushing your hair. Comb hair gently with a wide-tooth comb a least a couple times a day to prevent tangles. Also, keep in mind that as wonderful as fuzzy winter sweaters are, turtleneck sweaters can cause knots at the nape of your neck, so be wary of wearing them if they cause problems for you.
Trim often. If you are maintaining length, trim your hair about half an inch a month. If you are actively growing your hair, trim it a half inch every other month during the cold season. This will help prevent any breakage from moving up the hair shaft and causing you a boatload of trouble later!
Keeping hair conditioned will help to prevent static electricity. If you find your hair is flyaway in winter despite conditioning, an anti-static spray specially formulated to control static in your hair. Give your hairbrush a light spray of an anti-static product.
Avoid excessively hot water when you wash your hair. Hot water is drying to hair. Rinse in lukewarm water or even cold water for smooth, shiny hair all year ’round!
We tend to wear our hair up in a bun and get lazy with our hair dos in winter and that’s ok but it can also dry your hair out so try and be creative with simply but creative hair dos.
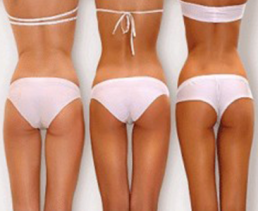
THE 3 GOLDEN STEPS TO MAKE YOUR SPRAY TAN LAST LONGER
Have you ever wondered how some girls make their spray tans last for ages?
Well I’m about to show you exactly how to make your tan last longer. The great thing about these techniques are they’re so simple and easy to do no matter what type of tan you have.
Your tan will turn out a lot better and last longer if you do the following 3 steps.
Rule #1: Exfoliate Like Crazy!
No matter how you’re going to go about getting your tan on whether it’s a salon spray tan or tanning lotion exfoliating beforehand is a must! Our skin is constantly shedding so it’s important to clear out the older dead cells.
When I say ‘Exfoliate Like Crazy’ I don’t just mean giving yourself a gentle scrub, I mean……
Step One: Start Off With A Dry Scrub
There are a lot of benefits to scrubbing your skin with a dry brush before getting into the shower.
It stimulates blood flow helping to remove toxins that interfere with skin cell generation.
Removes dead skin cells allowing newer cells to absorb color.
Reduces cellulite!
Exfoliate and detox the skin
Increases higher energy levels
And much more…
shining-bright-tans-exfoliate
Scrub your body starting from your feet up, always brushing towards your heart. Use strong circular motions or long strokes.
If you don’t have a dry scrub brush, I recommend using something like this.
* Use A Oil Free Scrub
The reason for this is because if you are applying a lotion or getting a spray tan, that extra oil can lead to streaking and unwanted discoloration. Defiantly not what you want to happen
If you’re not doing this already, I seriously recommend you give it a try. This one technique alone will dramatically make your tan last for a lot longer.
Also all shaving should be done 24 hours before when you exfoliate. If you wait until the day or just before your tan that skin is raw so the tan may not come out even and the tan can come out patchy.
Rule #2: Moisturize
Use aloe vera for after sun Moisturize directly after exfoliating which will do one thing – strengthen your skin.
By doing this, you’re ensuring your skin is in perfect condition before you start applying color to it. This means it will last a hell of a lot longer and at the same time will show color much more evenly.
Make sure you don’t apply any product during the 24 hours between moisturizing and tanning!
Adding moisture AFTER you get a tan is even more important. Apply a tan extender lotion on straight after you have had a shower.
Rule #3: When To Shower
Depending the development time of the lotion. They vary 2 hours to 8 hours. This means you can wash your tan off in 2 hours but you can leave it on for 4 hours the tan still keep developing over the next 24 hours. If you go for a 8 hour tan you must leave it on for at least 8 hours for the tan to develop fully and absorbed into your skin.
shining-bright-spray-tans-shades
So there you have it, the 3 golden rules on how to make your tan last longer. If you have any questions about these techniques, please feel free to drop me a comment below and I’ll get right back to you!

MOROCCANOIL
HYDRATION CREAM
For straight styles, apply a cocktail of Moroccanoil Treatment and Moroccanoil Hydrating Styling Cream from mid-shaft to ends of damp hair and then allow hair to air dry. The combination will make hair shiny, tame frizz and manage flyaways, leaving hair soft and smooth.
A leave-in styling cream that creates a soft, natural feel. Moroccanoil® Hydrating Styling Cream conditions, hydrates and fights frizz. Its nourishing, argan oil-infused formula adds shine and definition with a soft hold. Perfect for blow-drying, taming flyaways and refreshing day-old styles
HAIR SPRAY
Enjoy long-lasting, weightless hold for soft, natural styles. Moroccanoil® Luminous Hairspray Medium is a flexible hairspray featuring a combination of highly sophisticated ingredients infused with argan oil. This lightweight and workable finishing formula offers a long-lasting, flexible hold and provides a reflective shield of shine that fights frizz and humidity. It brushes out easily and leaves no sticky or flaky residue. Medium hold is ideal for natural styles including easy updos (such as ballerina buns and ponytails) and blowouts.
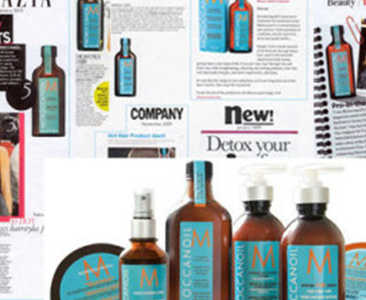
MOROCCANOIL
Hair that’s silky, healthy, shiny and full of life. Moroccanoil® Treatment is the product that pioneered oil-infused hair care and created the worldwide buzz on argan oil. An essential foundation for hairstyling that can be used as a conditioning, styling and finishing tool. Infused with antioxidant-rich argan oil, strengthening proteins and shine-boosting vitamins, this completely transformative treatment detangles, speeds up drying time and boosts shine—leaving hair smooth, manageable and nourished with each use. Discover the original
INTENCE CURL CREAM
Looking for a quick and easy hairstyle that help prevent hair damage?
“For most women, damage is caused by excess heat styling, so wash-and-go hair styling is a surefire way to avoid damaging strands. For curly hair, apply Moroccanoil Intense Curl Cream throughout hair; it will define, moisturize and nourish strands while fighting frizz. Curls will look shiny and soft, with no sticky residue!”
For natural curls and waves that look shiny, shapely and beautifully refreshed, Moroccanoil® Intense Curl Cream is a leave-in conditioner that defines, moisturizes and fights frizz without stickiness. Infused with nourishing argan oil and vitamins to keep waves and curls looking hydrated and touchably soft.
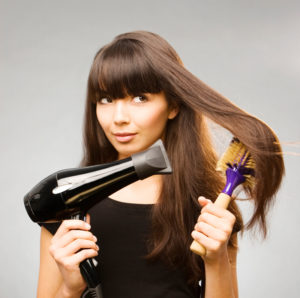
HOW TO MAKE YOUR BLOW DRY LAST FOR DAYS
How To Make Your Blowdry (Blowout) Last For Days
I love the feeling of salon-fresh hair. I want to show you how I make my blowdry last for days to keep that salon feeling for as long as possible.
A blowdry is the same as a blowout, just in case there was any confusion. As I’m Australian I’ll keep calling it a blowdry.
Now there are lots of blowdry bars opening up to get your hair done for a bargain, but even still I want my hair to last.
The finishing look of your hair is what make your colour stand out and how bouncy or smooth your hair looks.
So to keep your blowdry looking awesome for as long as possible I follow these 10 tips.
1.Don’t Touch Your Hair
I know your hair feels amazing after a blow dry but please don’t touch it. Your hands are dirty and it’s messing up your hair. I’m a nervous hair twirler so I know how addictive it can be. Be really aware and stop yourself from touching your hair.
2.Sleep With Your Hair Clipped Up
At night, twist your hair up and clip it loosely on top of your head. See my post on how to wake up with great hair. You’ll avoid frizz from your pillow and tangles during the night.
3.Sleep On Silk
Talking of pillows, switching to a silk pillowcase really does make a difference. My mum told me this trick and she’s right.
4.Use A Shower Cap
Sexy, I know. But your hair needs to be protected and not get wet.
5.Take Shorter Showers
And turn down the temperature a little. You want to avoid too much steam which will create frizz in your hair.
6.Dry Shampoo Is Your Secret Weapon
When those oily roots threaten to undo your do, spray some dry shampoo and brush it through your hair. If you don’t love dry shampoo, you might be making these dry shampoo mistakes.
7.BRUSH GENTLY
Choose a gentle brush like my beloved Mason Pearson or a Tangle Teezer. These brushes will keep your hair looking smooth rather than fluffy.
8.It’s Ok To Restyle
You can use a round brush to restyle any kinks with your blowdryer. I often reshape the layers around my face to keep them looking the way I like.
9.Add In Some Curl
On days three or four, if I’m starting to get a lot of kinks in my hair, I’ll curl it with a 1-inch curling wand. Adding in some texture helps prolong the style so I can still wear my hair out.
10.Braid It
Towards the end of my blowdry’s life, I’ll braid my hair and put it up. This way it still looks good and I can avoid another day of washing my hair. Sometimes when I take my hair out I have such great waves from the braid I push it one day further…
Try these handy tips and get longer out your blow dry!
Salon Products vs Supermarket
What Is The Difference?
The difference between salon-professional shampoos versus supermarket shampoo is the investment made in the product development to protect hair against UV protection, thermal repair from over-styling; and colour-fade preservation.
The internal makings of professional shampoos and conditioners are more concentrated with essential ingredients to repair hair from the inside out.
Supermarket shampoos are generally detergent based, so they will lather up and give you the impression that it is cleansing faster.
Professional is a choice for that reason as it’s all about protecting your hair colour.
Stick with a shampoo that suits your hair and gives you a good clean result, but doesn’t leave your hair feeling brittle or stripped when you jump out of the shower.
Salon brands are created with results being the top priority.

Some key points to keep in mind which your choosing your next shampoo.
1. Supermarket shampoo and conditioners contain silicone so it wraps around the hair leaving it looking shiny and feeling soft. Unlike salon products they lock in your colour add shin and leave the hair feeling soft not using harmful chemicals and don’t contain silicone.
2. The silicone build up is harmful on your hair. When lightening your hair the hairdresser needs to get through that build up before it actually starts to lighten the hr. In the process this is more damage to your hair. Less build up the better.
3. Supermarket products contain sulphates that is like an exfoliant. Every time you wash your hair its washing away your colour down the drain. When you feel like your hair looks flat, dull and the colour doesn’t seem to have lasted long this will by.
4. Supermarket products are made up of cheap ingredients which is why they lather more and you feel like you need to use heaps of product to make it feel clean. In comparison salon products you use small amounts and they don’t lather as much but last longer and you hair feels amazing!
Don’t ever buy a product based on the smell. As an experienced hairdresser it is a reoccurring problem that people buy off the shelf by the name and what they think sounds good but 9/10 there using the wrong product.
Ask your hairdresser for the best products to add condition to your hair, keep your colour lasting longer and which product is best suited for you hair type.


Going from Dark to Blonde
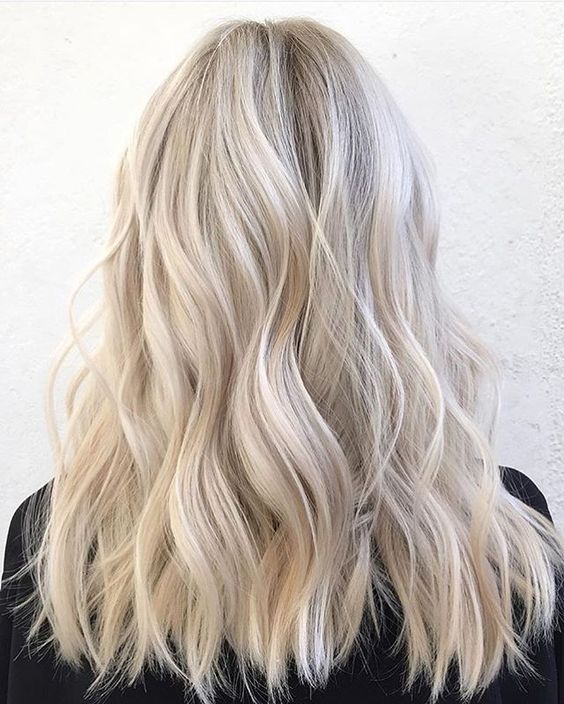
The Truth about going Blonde
Going from Brunette to Blonde is not an easy process. A lot of clients think it can just be done in one visit, by putting one color all over the hair, isn’t as simple as that…. It takes skill, patience, confidence, experience, a colorist who knows her stuff, and a client who is cool, calm and collected through the many stages of blonding. As a Keune Master Colourist here at Shining Bright, Bendigo we are blonde and balayage experts. In this post we will talk about weither you’re the right candidate for becoming a blonde, how to get there, and how to keep it looking good afterwards.
Are you ready?
First things first. You need to ask yourself if you’re ready to be dedicated to the mission to be blonde. Lets talk about what it entails to become a blonde.
Damage– Going lighter calls for some type of damage to your hair. If you have box color, or any type of color at all on your hair when going blonde, your stylist WILL HAVE to use bleach. There is no other way to lighten hair with color on it. Color does not lift color out of hair. End of story. This is why it’s important to gradually lighten your hair when going from one extreme to the other. If your hair is already severely damaged, you need to ask yourself, and your stylist if its in your best interest to go lighter. I’ve had to ask clients several times, would you rather have healthy, shiny hair or dull, damaged hair? If your stylist (or several stylists) tells you it’s not in your best interest to go lighter, PLEASE trust them. You will find some stylist out there that WILL lighten your hair, however, it will probably cause damage or in worst cases, break off. I’m not saying that you can’t ever go light. If your hair is healthy, and the lightening process is done correctly and slowly, you can safely go lighter with your hair over time. But even then, there will most likely be some sort of minimal damage to your hair.
I highly recommend using Olaplex in the process. It will strengthen your hair during the process. You can read our post on Olaplex here
Time- Going from dark to light takes several appointments, and normally several hours at a time. Plan to be in the salon every 4-6 weeks to start with, and plan to spend several hours in the salon with each visit. No stylist should try to take your hair from a very dark color, to light in one session. In fact, I have turned clients away that would just not listen to me when I said I couldn’t take them from dark brown to blonde in one session. If you’re planning on going light, make sure you tell your salon beforehand so they can schedule enough time for you. If you’re a new client, go in for a consultation first and tell them all about your current hair colour and you’re wanting to go blonde.
Patience– Like I stated above, it takes time to get to the desired blonde of your choice. Be patient with your stylist, when going lighter and understand that you might have to live with a color that is “in between” what you’re hoping to achieve for a few weeks. Dark hair is naturally going to lift to warmer tones, especially if it has old box color on it, so you are most likely not going to be an “ash” blonde until you’re closer to the lightest blonde shade. However, it should still be a pretty color in the process.
Money- Being blonde isn’t cheap, it is a higher maintenance lifestyle, not suited for everyone. If your going from brunette to blonde, you will need several appointments for full highlights about every 6 weeks, until your desired color is achieved. Once you’ve reached your desired color, you will need to come in for touch ups or a base break every 5-8 weeks depending on the contrast in your natural color vs your blonde. At this point, you can get by with just doing a partial highlight, and a full every few times, which is less expensive. You will also need to invest in good products to keep your blonde looking good, and healthy!
Entering the Blonde Family
Now, after deciding weather or not your ready for the blonde lifestyle, we can talk about how to get there safely, and successfully.
Go to a Pro– Trying to go blonde on your own is a big no no for several reasons. It can cause breakage, and most of the time reveals unwanted brassiness. Always go to a pro who knows how to safely take your hair light without damage, while also preventing those unwanted brassy tones! Like the client shown below, I’ve seen several attempts of “at home color gone wrong” and it will most definitely save you time and money to go to a professional. (color corrections aren’t cheap) Don’t be afraid to set up a consultation at your salon, or even a consultation at several different salons to see which one fits you best.
Be Honest– Your stylist will ask you questions about your hair history. We’re not doing this for fun, we need to know exactly what was done to your hair previously, as far back as you can remember. Knowing how many times you’ve put color all over your hair, or how many times you’ve gone dark to light and then back again, will let us know how easy or difficult it will be to get you light and also tells your stylist which products to use on your hair this is an essential part.
Prepare for your visit– It’s never too early to start using good products on your hair to get it in the best possible condition. Weeks prior to your hair appointment, start using a good protein based shampoo and conditioner. Deep Condition the heck out of it. And continue to do this for as long as you live. Or at least while your a blonde. The day of your visit, come with clean, dry hair so your stylist can see your natural color, easily. Sometimes when hair is unwashed, it makes the natural color look darker than it really is because of oils, and build up.
1st Visit- Depending on your hair history and how dark your hair is, your stylist will most likely start your first appointment by doing highlights all over. They will artistically choose what to lighten. Since you will still have some of your previous color left in between what is being highlighted, they should not leave too much contrast, or take too “chunky” of sections in order to keep the color looking beautiful and natural until your next lightening session. If your hair is extremely dark or has years of box color on it, your stylist could “strip” the color by doing a color removing process, and then proceed to do highlights.
It is SUPER important to make sure your stylist knows ahead of time that you’re wanting this type of change. If you are scheduled for a partial highlight and come in requesting a big change like this, your stylist will only be able to do what she has enough scheduled time for prolonging the process of going blonde even more.
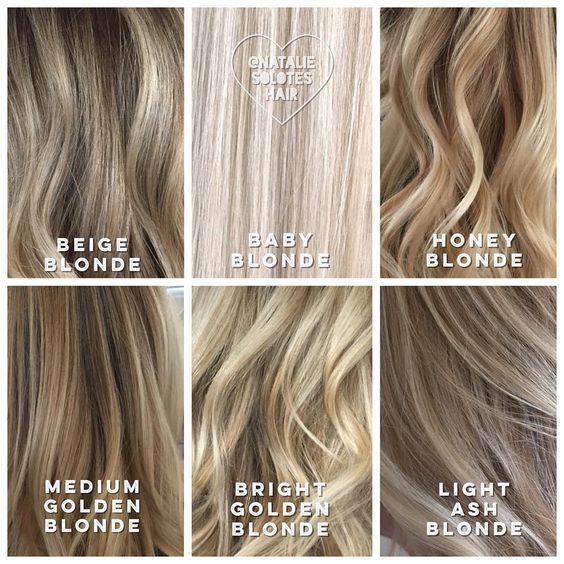
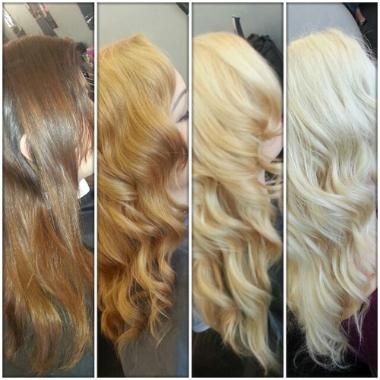
2nd & 3rd Visit- Over your next few visits your stylist will strategically highlight the darker pieces out of your hair each time. As you can see from photos above. Each time you should get lighter and lighter!
Once your desired color is achieved and you’ve come to the conclusion that blondes have more fun…its time to schedule highlight touch ups for a while. You can play with lowlights, or different shades of blonde still. Your stylist has been putting lightener (bleach) from scalp to ends with each visit prior (hence the concern of damage) and it’s now time to give your hair a break, and only focus on the “outgrowth” for a while!
Everyone’s lightening process will be different depending on the history of your hair, and texture of hair. Someone with less coloring processes, and thinner, fine hair may be able to lighten their hair more quickly than someone with years of color that has super thick resistant hair.
What’s best for you!
After investing time, money, and emotions into being a blondie, it’s probably in your best interest to know how to make the most out of your new hair!
Invest in GREAT Products– This will be the foundation for keeping your blonde hair looking like perfection. Nobody wants straw like hair. Favorite of mine is Keune Vital Nutrition I would highly recommend using this every day, as well as the deep conditioning mask once a week. This is probably the most important part of being blonde. You have to keep your hair healthy during and after the process!!
Get a Glaze- A glaze is a sheer shade that helps achieve the perfect blonde tone and seals in an extra 4-6 weeks of shine. You can pop in the salon for a clear glaze to lock in color, shine and softness, or a toning glaze to help keep your blonde from getting brassy in-between touch ups!
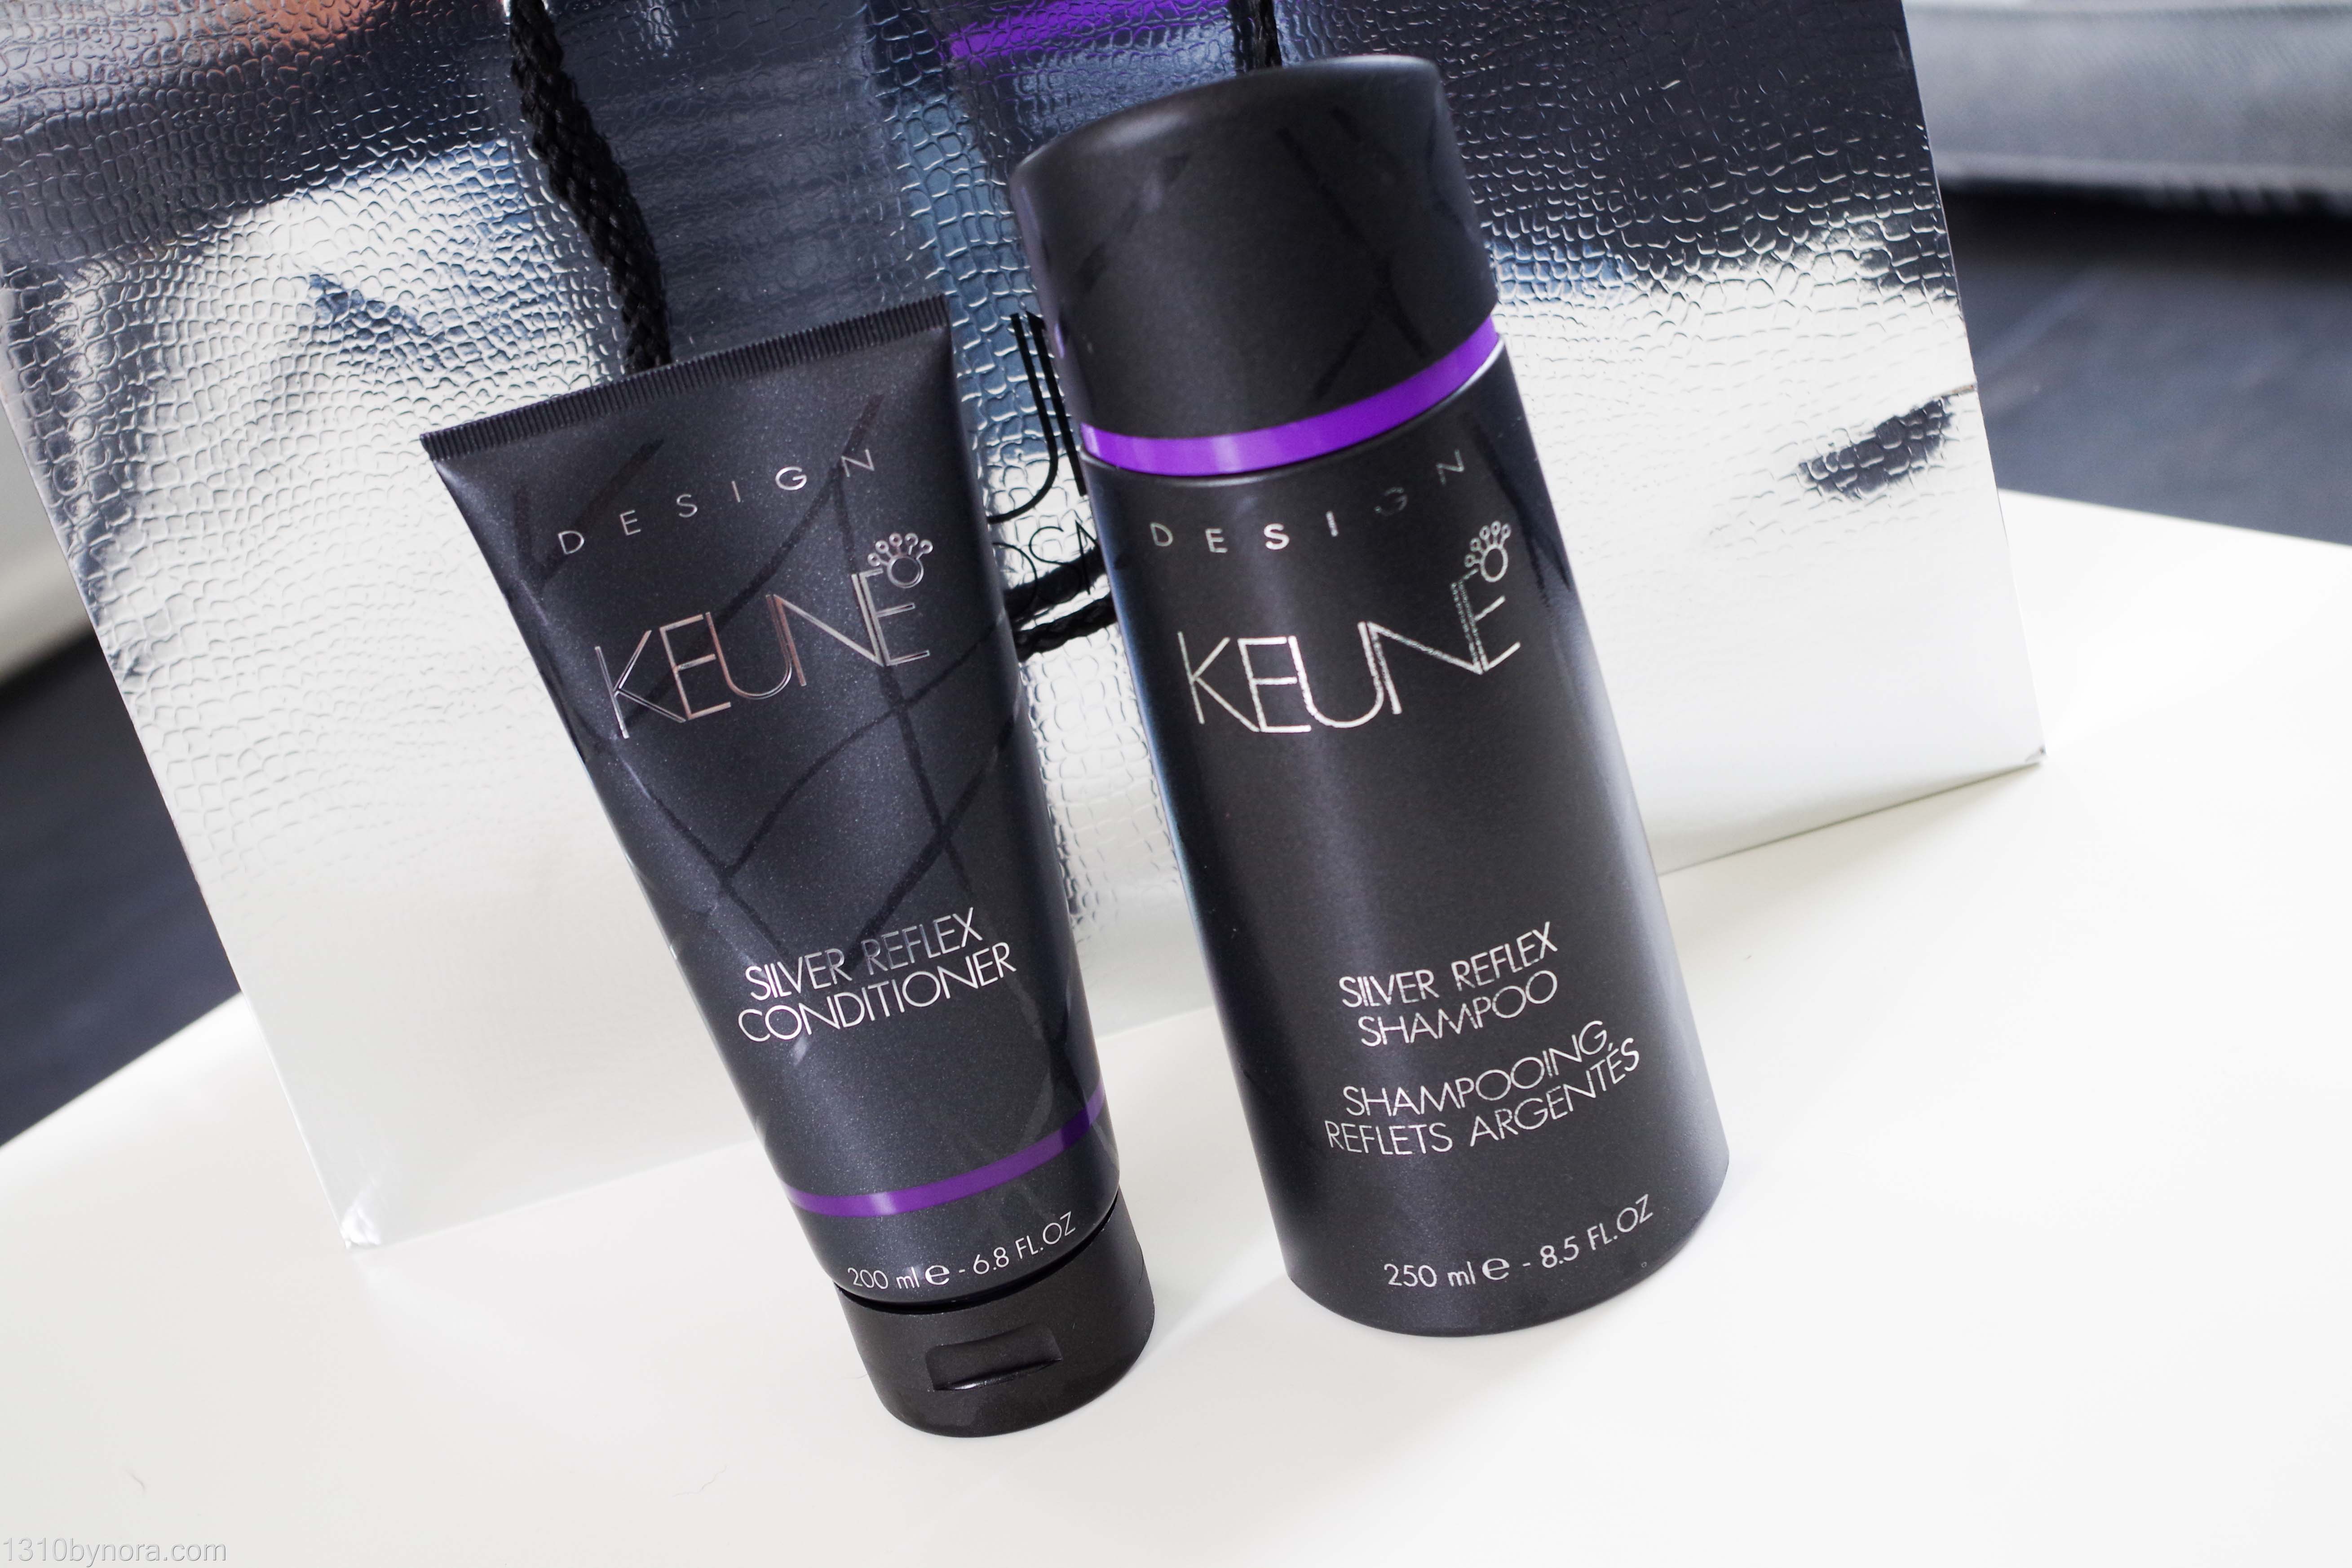
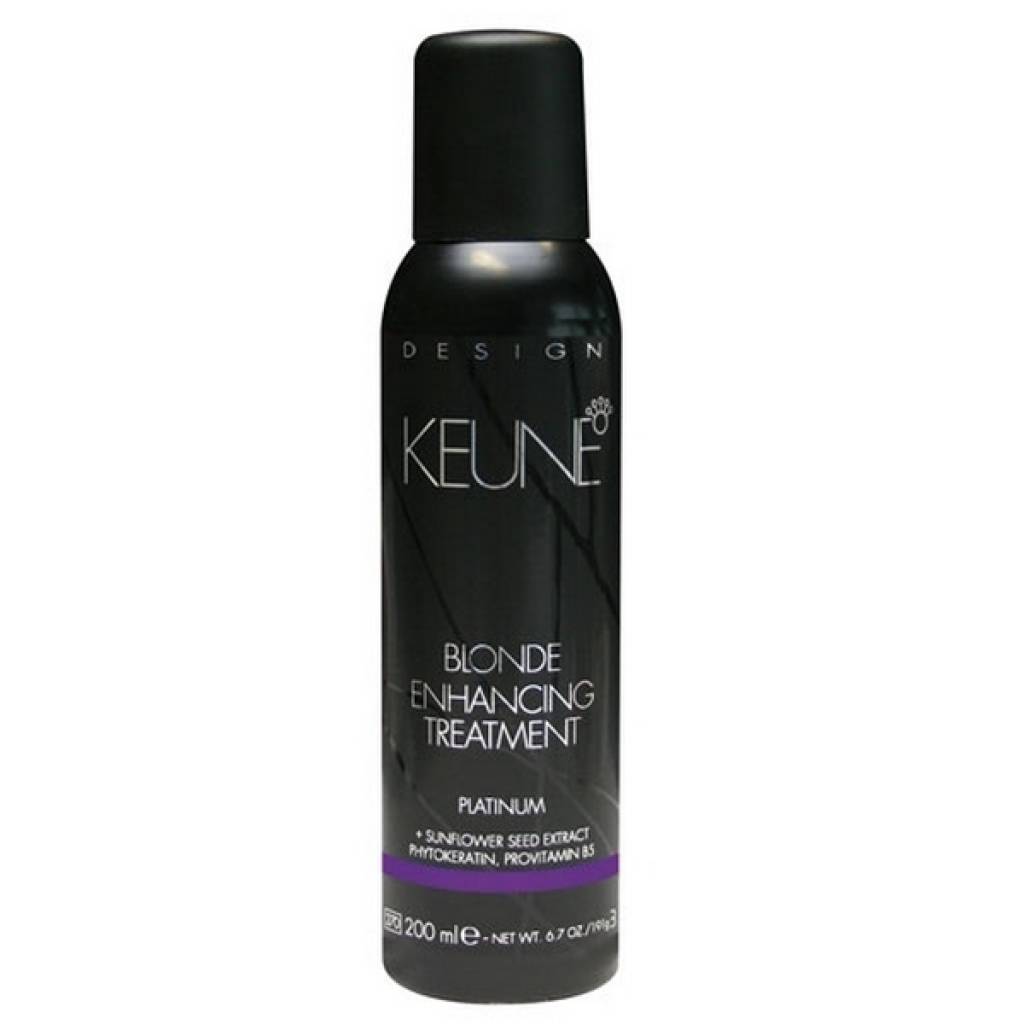
Use a Purple Shampoo- Using a purple shampoo is a must. Use it once a week to cut out yellow tones, and help keep your blonde bright and beautiful! Purple is the direct opposite of yellow on the color wheel, “therefore” canceling out yellow tones in hair. Another favorite of mine is Keune Sliver Reflex Shampoo and Conditioner. Also the Blonde Enhancing Treatment which comes in for a form of mousse that you can use as often as you like. It will tone and hydrate the hair at the same time!
Going blonde can be a mission but if you trust the process and your stylist you will get the colour you want!!